Paper Plate Crafts for Toddlers: 9 Easy Ideas With Household Items
Updated 29 October 2026 · 9 min read
A paper plate is one of the best things you can hand a toddler. It is flat, light, cheap and the right size for small hands, and you probably have a stack in the cupboard. The nine crafts below take 5 to 15 minutes to set up, need only things from around the house, and can be changed to suit a one-year-old or a nearly-four-year-old. We have also put in the safety points that matter most at this age.
TL;DR
- Start with the simplest version: one plate, one big tactile job such as painting, sticking or scrunching. Toddlers enjoy the doing far more than the finished animal.
- Most crafts here need a plate, paint or crayons, glue or tape, and scrap paper. No shopping trip needed.
- Younger toddlers can join in with adapted steps: sticky paper instead of glue, large brushes, fingers instead of tools. You do the cutting.
- Keep small bits (googly eyes, sequins, buttons) out of the project for under-threes, and stay beside your child the whole time.
- Praise the process, not the product. Talk about what your child is doing and the words will follow.
Table of Contents
- Why paper plates work so well for toddlers
- What you need before you start
- Nine paper plate crafts to try
- How much prep and time to expect
- Adapting crafts for different ages and needs
- Keeping paper plate crafts safe
- Getting the most from the time together
- Our perspective on craft time with toddlers
- Make craft time easier with Mooshie
- FAQ
- Sources
Why paper plates work so well for toddlers
A plate gives a toddler a clear edge and a big surface. That matters because very young children are not ready to plan a detailed picture. They want to push paint around, stick things down and tear things up. A plate holds all that without needing a perfect result.
There is a real benefit to this too. Making art together can support motor skills, give children room to explore ideas and express themselves, and strengthen the bond between child and carer through shared experience and joint attention, according to The Conversation’s piece on creating art with your children. ZERO TO THREE also points out that art lets children share feelings, try out ideas and see the results of their own choices, which builds a sense of agency.
In practice, this means a plate covered in blue scribble is a good result. If it ends up looking like a fish, that is a bonus.
What you need before you start
You can make every craft in this list from a small kit:
- Paper plates (plain white, uncoated ones are easiest to paint and stick on)
- Washable paint, crayons or chunky felt tips
- Child-safe PVA glue or a glue stick, plus masking tape
- Scrap paper, old magazines, tissue paper, cereal box card
- Child-safe scissors for you, kept out of reach
- A wipe-clean tray or an old tablecloth, and a damp cloth
You do not need to put all of it out at once. ZERO TO THREE’s guidance for this age suggests having supplies ready without overwhelming your child with too many options so they can lead the creative process. Put out two or three things and keep the rest in a box.
If you have used plates left over from a picnic, that works too. The BBC CBeebies grown-ups guide to easy crafts for under-sixes treats paper plate creations as a reuse idea and suggests wiping used plates with a damp cloth and drying them before crafting.
Nine paper plate crafts to try
1. Sunshine plate
Paint a plate yellow, then glue on triangle rays cut from yellow or orange paper around the edge. It is the classic summer craft, but it works on a grey October afternoon just as well.
- Younger toddlers: let them paint the plate with a big brush or a sponge. You cut and stick the rays.
- Older toddlers: they tear the rays from paper and glue them on, and you talk about “hot”, “bright” and “round”.
2. Pretend-play crown
Cut zig-zag points around the rim of a plate with the middle removed, then decorate. The Craft Warehouse guide suggests glitter, stickers, markers or adhesive gems. For toddlers we would stick to stickers, crayon and big pieces of torn paper, and skip anything small enough to swallow. Fit it to your child’s head with a strip of tape or a band of card, and you are done.
- Younger toddlers: stickers are a brilliant fine motor workout. Peeling and pressing is hard at this age.
- Older toddlers: they choose the colours and tell you whose crown it is.
3. Dinosaur
The same guide describes building a dinosaur from plate pieces for the body, head and tail, then decorating with paint, crayons and construction paper. Fold one plate in half for the body, cut a second into a head and tail, and let your toddler colour everything green and spiky. Ask whether it is a gentle dinosaur or a stompy one, and let your toddler stomp it around the room.
- Younger toddlers: scribble on the body and help you tape the pieces.
- Older toddlers: add torn paper spikes with a glue stick.
4. Fish in a paper sea
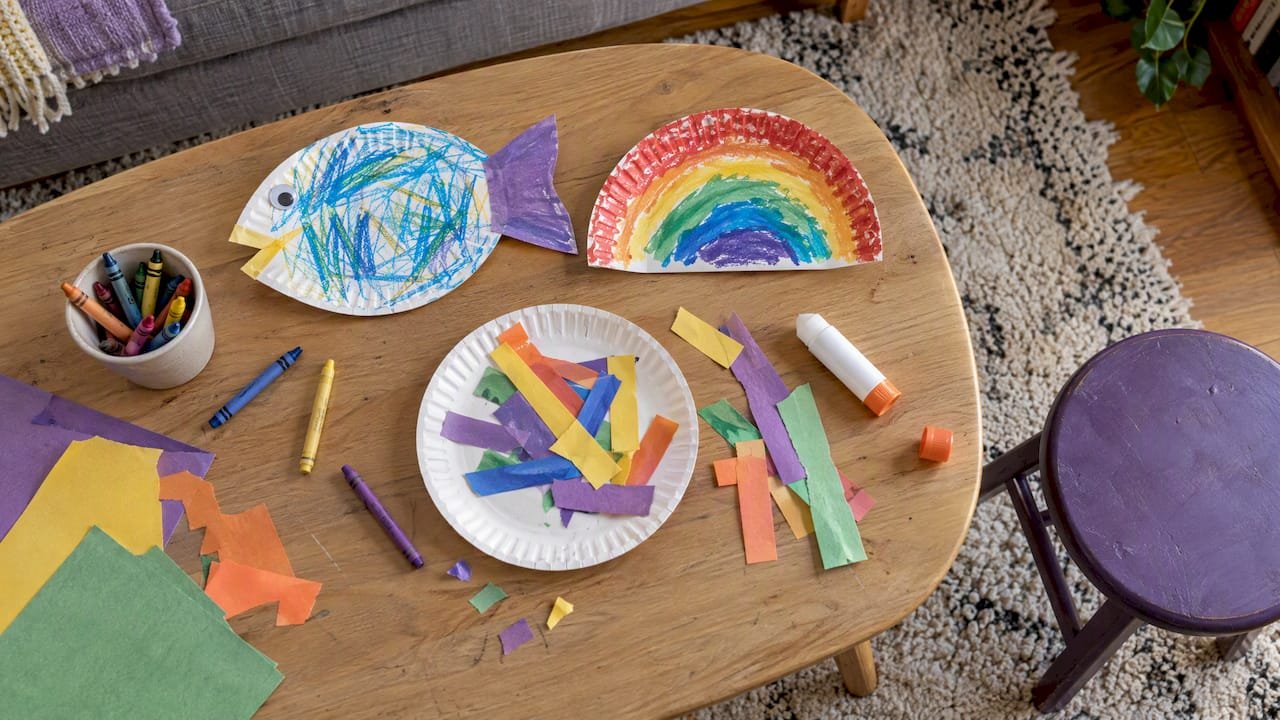
Paint or scribble a plate in any colour. Cut a triangle wedge from the edge and tape it to the opposite side as a tail. Draw a circle for an eye with a crayon (no googly eyes needed). Hang a few from a string across a doorway for an easy under-the-sea scene.
5. Lion face
Paint the plate orange or yellow. Cut strips of brown and orange paper for the mane and let your child glue them around the rim. Draw a face in the middle or let them do it. Strips of paper are safer than wool or yarn, which can wrap around fingers.
6. Sticky plate collage
This is the best one for little ones. Tape a plate to the table with the sticky side of a piece of clear sticky-back plastic facing up, or tape strips of masking tape across the plate, sticky side out. Offer torn tissue paper, bits of magazine and large leaves. Your toddler presses things on and no glue ends up on hands, hair or sofa.
- Babies from around 6 months: you can hold the plate while they pat at a large piece of tissue paper. Keep a very close eye, because everything goes in the mouth at this age, so stick to big, safe, non-toxic pieces and take the plate away if they start to chew it.
7. Plate drum
Decorate the underside of a plate with crayons, then turn it over and tap it with a wooden spoon. Make a big plate and a smaller one and listen to the different sounds. This one needs almost no prep and gets noisy quickly, so keep it for a time when you can cope with that.
8. Rainbow plate
Cut a plate in half. Your toddler paints arcs of colour or sticks on strips of coloured paper. Add cotton wool clouds at each end if you have it (large pieces only). Name the colours as you go.
9. Animal mask
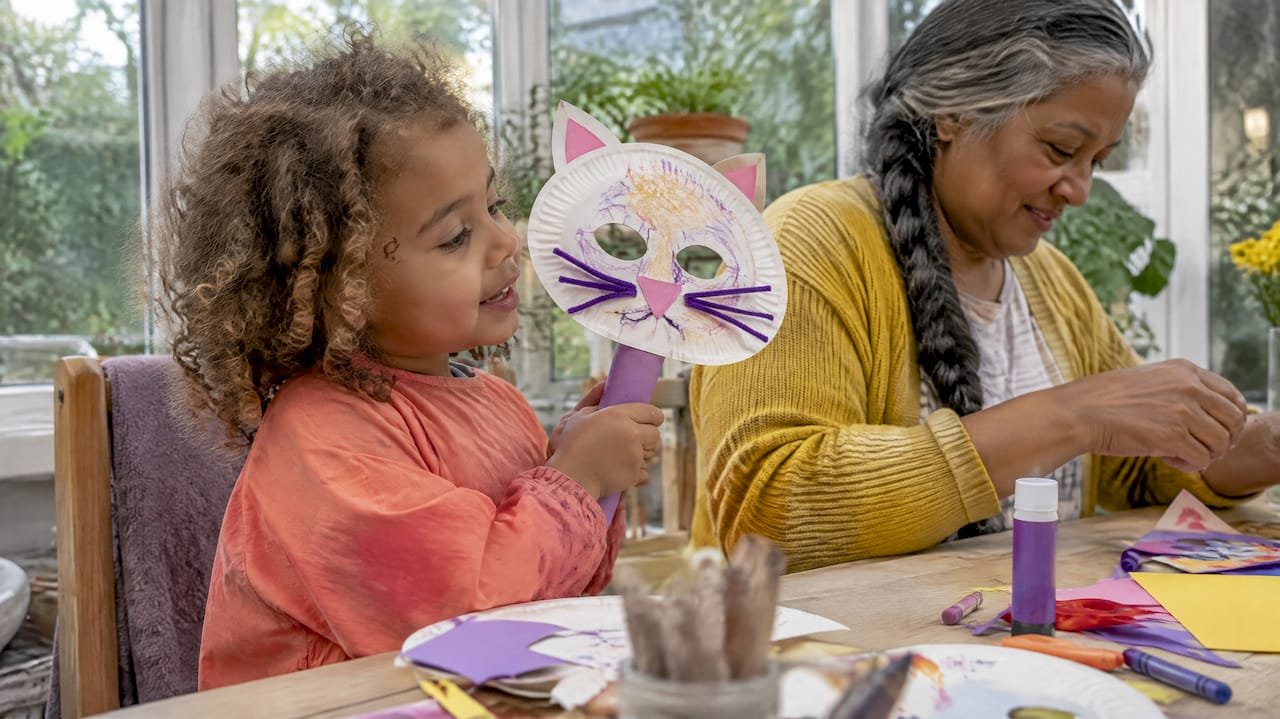
Cut eye holes in a plate and let your child decorate it as a cat, bear or owl. Tape a lolly stick or a rolled strip of card to the side as a handle so it can be held up to the face. Many toddlers will not want it on their face, and that is fine. They can just wave it around.
How much prep and time to expect
None of these need much planning. As a rough guide from our own experience of toddler play, here is what to expect. Real times will depend on your child’s mood and how many times the paint pot gets tipped over.
| Craft | Your prep | Toddler’s play time | Best for |
|---|---|---|---|
| Sunshine plate | 5 min | 10 to 15 min | 18 months and up |
| Crown | 5 to 10 min | 10 min | 2 to 4 years |
| Dinosaur | 10 min | 10 to 15 min | 2 to 4 years |
| Fish | 5 min | 10 min | 18 months and up |
| Lion face | 10 min | 10 min | 2 to 4 years |
| Sticky collage | 5 min | 10 to 20 min | 6 months and up (supervised) |
| Plate drum | 2 min | 5 to 10 min | 12 months and up |
| Rainbow | 5 min | 10 min | 18 months and up |
| Animal mask | 10 min | 10 min | 2 to 4 years |
If you only have five minutes, pick the plate drum or the sticky collage. If you have a quiet half hour, the dinosaur gives you the most to talk about.
Adapting crafts for different ages and needs
The same plate can work for very different children. A few simple changes make the difference.
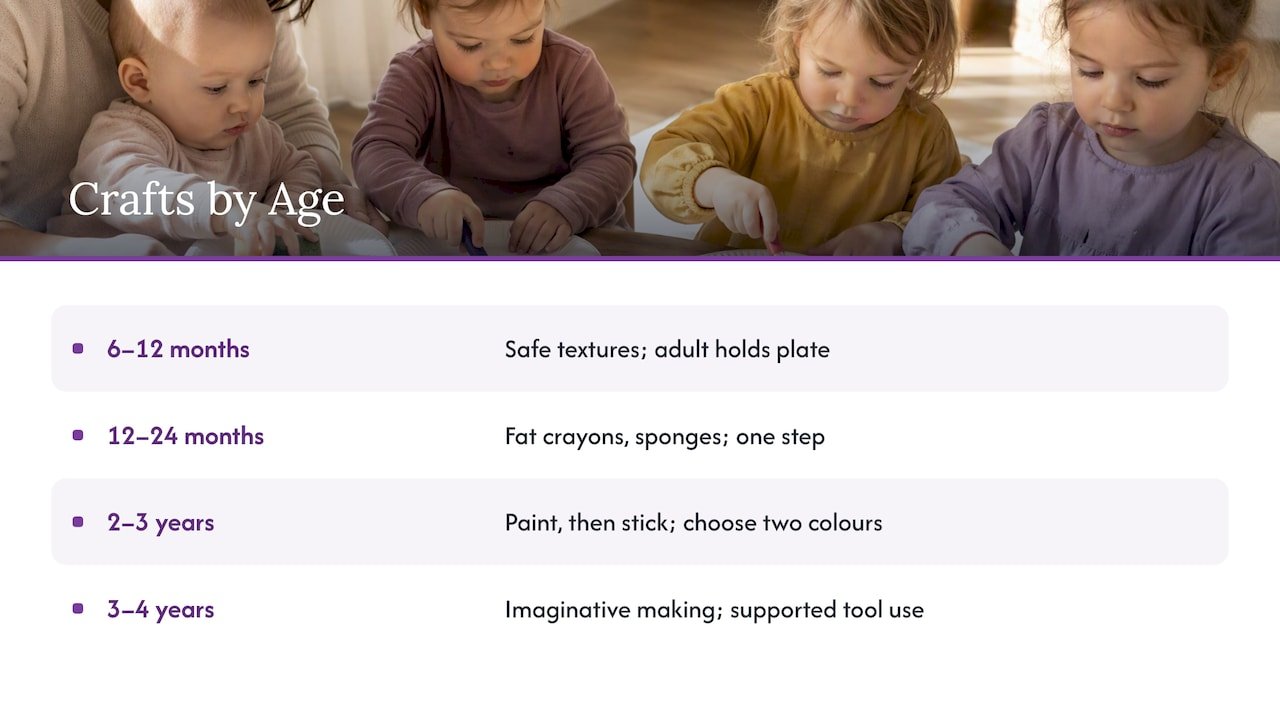
6 to 12 months. Think sensory, not craft. Offer a plate with a few safe textures to pat and look at. Stay close and hold the plate yourself. For more ideas at this stage, our guide to sensory play ideas for toddlers uses only things you already own.
12 to 24 months. Big marks and big movements. Offer fat crayons, sponges and sticky surfaces. Expect lots of tasting and tipping. Keep the job to one step.
2 to 3 years. Two steps are now realistic: paint, then stick. Let your child choose between two colours. The Department for Education’s early years guidance recommends well-organised, safe, accessible materials and letting children choose what to use.
3 to 4 years. Your child may now want the plate to “be” something. Ask what they are making, then follow their lead. Let them try the glue stick and, with you right beside them, blunt-ended safety scissors.
Sensory-sensitive children or different developmental needs. Activities can be adapted by using simple tactile materials, such as paint or glue on a large surface. If your child dislikes messy hands, offer a brush, a sponge on a stick or a sealed zip bag with a blob of paint inside that they can squish through the plastic. A guide to sensory play and child development has more on offering tactile materials in ways that suit different children. For calm, predictable routines, see our autism activities for toddlers, and for seated or limited-mobility play, our wheelchair-friendly and seated activities.
Keeping paper plate crafts safe
Plates are safe. The extras are where the risks creep in. Babies and toddlers are most at risk of choking because they explore by putting things in their mouths, as NHS Better Lives Healthy Futures explains, and the same page advises keeping small objects out of reach.
For craft time, that means:
- Leave out googly eyes, sequins, beads, buttons and adhesive gems for any child who still mouths things. Draw eyes on instead.
- Use large pieces. If it fits through a toilet roll tube, it is too small for an under-three’s craft box.
- Do the cutting yourself and clear away scraps as you go. Torn-off plate corners can end up in mouths too.
- Stay within arm’s reach. Do not turn your back to answer the door.
- Check the label. For anything you buy, read the age warnings and look for the Lion mark, as Healthier Together recommends for toys.
- Use washable, child-safe paint and glue and keep them out of reach afterwards.
It is also worth knowing what to do if something goes wrong. The NHS page on how to stop a child from choking explains the steps: back blows or chest thrusts for babies under 1, and abdominal thrusts for children over 1, when the child is conscious and not breathing effectively. Read it once now, when nothing is happening, rather than for the first time in an emergency. A baby and child first aid course is another option if you want to practise.
Getting the most from the time together
The craft is only half the point. The other half is the conversation.
Crafting gives you a lot of chances to build language. You can describe the materials and actions, using words like cut, roll, soft or shiny, so your child connects words to what they feel and do. It is that simple: say what you see and do, and pause to let them answer.
Some easy habits:
- Comment, don’t quiz. “You pressed the green one down” works better than “What colour is that?”
- Focus on the process. ZERO TO THREE advises adults to notice the process, not just the product and to pay attention to what children are thinking about their drawings.
- Do not fix it. If the lion has three eyes and a purple mane, that is the lion.
- Sit down too. Make your own plate next to theirs. Toddlers copy.
Want to go further on talking while you play? Our guide on how to narrate play for your toddler’s language growth walks through it, and our page on bonding activities for busy parents has more ideas that take 2 to 15 minutes. If you like to use up scraps and boxes, junk modelling for toddlers is a natural next step.
Our perspective on craft time with toddlers
We built Mooshie Moments for tired grown-ups, so we think about craft a little differently from most idea lists.
First, a craft should not feel like a project. If a parent has to buy supplies, print a template and clear the kitchen table, it will not happen on a Tuesday at 4pm. A plate, a crayon and some scrap paper is enough, and that is the spirit of everything in our app: ideas that use what is already in your home.
Second, the “why” matters. When you know that sticking, tearing and scribbling build hand strength and give your child a sense of choice, you worry less about whether the sun looks like a sun. Every activity in Mooshie comes with a plain-language explanation of what it does for your child’s development, so you can relax and play.
Third, we want you off your phone, not on it. Mooshie is there to give you a quick idea, then get out of the way, so you can sit on the floor, make a messy lion together and talk. Real play and real bonding do not need a screen, and a paper plate is proof.
— samit
Make craft time easier with Mooshie
If you run out of ideas halfway through the week, Mooshie gives you quick, screen-free activities for children from 6 months to 4 years. You pick your child’s age and how much time and energy you have, and it suggests something you can do with things already at home, with the developmental reason explained in plain words.
Have a look at Mooshie and see what fits your next 10 minutes. If you work in a nursery or early years setting, we also offer a Partnership Pack and home-learning resource for the families you support. For a wider range of ideas sorted by skill, try our low prep toddler activities by skill area.
FAQ
What paper plate crafts are best for a 1-year-old?
Keep it sensory and supervised. A sticky plate with large pieces of tissue paper, or a plate to scribble on with a fat crayon, suits this age. Avoid small decorations, because at this age most things go straight into the mouth. You do the cutting and the sticking.
What can I use instead of googly eyes and glitter?
Draw eyes with a crayon or marker, or stick on circles cut from card or paper. For sparkle, use a big piece of foil torn by hand or shiny wrapping paper. These are large enough not to be a choking risk, but still stay close and take pieces away if your child starts to chew them.
Are paper plate crafts messy?
They can be, mostly when paint is involved. Use a wipe-clean tray or an old tablecloth, put only a little paint out at a time, and keep a damp cloth to hand. Sticky collage and crayon crafts are the cleanest options if you are short on time.
How long should a toddler craft session last?
Expect about 10 to 15 minutes, and sometimes only five. Toddlers often finish when they lose interest, not when the craft is done. That is normal, so let them leave it and come back later.
Can I reuse paper plates from a party or picnic?
Yes, if they are clean and dry. The BBC CBeebies guide suggests wiping used plates with a damp cloth and drying them before crafting. Do not use plates with greasy marks or any food residue that your child might lick off.
Sources
- Why creating art with your children is important, The Conversation
- Raising the Next Frida Kahlo or Pablo Picasso, ZERO TO THREE
- How Your Child Grows: 25 to 36 months, ZERO TO THREE
- Learning to Write and Draw, ZERO TO THREE
- Easy crafts for under-sixes, BBC CBeebies
- 5 Simple Paper Plate Crafts Kids Will Love, Craft Warehouse
- Self-expression, Help for early years providers, Department for Education
- Safety: preventing choking, NHS Better Lives Healthy Futures
- Choking, Healthier Together (NHS)
- How to stop a child from choking, NHS
- Safe activities with toddlers, BBC Tiny Happy People
- Sensory Play and Child Development: A Parent’s Guide
Recommended
- Babysitting Toddlers: 12 Low Prep Ideas and Why They Help
- Christmas Activities for Toddlers: Easy Ideas at Home
- Cardboard Box Toddler Activities: 12 Ideas by Age
- Pasta Play for Toddlers: 9 Easy Ideas and Safety Rules
Want a new idea every day, matched to your child's age?
Mooshie Moments gives you simple, guided play ideas for ages 6 months to 4 years.
Download free on the App StoreMore like this
Toddler Scavenger Hunt: Easy Ideas for Home and Garden
Easy toddler scavenger hunt ideas using things you already have: indoor, garden and nature walk hunts, by age, with safety tips and…
Camping With Toddlers: Activities That Work at the Campsite
Easy camping activities for toddlers using what you already have: nature play, campfire-free games, rainy-day ideas and safe-play tips for UK campsites.
Eco-Friendly Toddler Activities Using Things You Already Have
Simple eco-friendly toddler activities using things you already have: water play, nature hunts, junk modelling and garden play, with safety tips for…